Your drawing looks stretched
The reference and paper do not have matching grid proportions. If the reference uses square cells, the paper cells must be square too. Do not copy an 8 × 8 rectangular grid into an 8 × 8 square one.
 Start Tutorial
Draw what you see, one square at a time.
Learn how the grid drawing technique helps you copy proportions and enlarge a reference. Follow an illustrated example, work out your drawing size, and try it with your own photo.The grid method of drawing is a way to copy a picture by placing matching grids over your reference and drawing surface. Instead of guessing where an outline belongs on a large sheet, you look closely at its position inside one smaller square. You can copy a reference at the same size or enlarge it while keeping the proportions consistent.
A grid helps with measuring, not with drawing the lines for you. You still observe the subject and choose how to sketch its curves, shapes, values and details. It works for portraits, landscapes and simple still-life objects.
Start with basic drawing materials. You can create the reference grid online or draw it directly over a printed photo.
Working digitally? Place a transparent grid overlay on a separate layer above your reference in a drawing app.
Use the same grid on your reference and on paper from start to finish.
Start with a clear photo or simple still life. Decide what belongs inside the picture and crop before making the grid. A 4:3 reference works well for the 8-column, 6-row example below. Keep that crop unchanged throughout your drawing.
In the Drawing Grid Maker, choose 8 columns and turn on Square cell lock. A 4:3 image then has 6 complete rows. Turn on A–H and 1–6 labels if you want to find the same cell on your paper quickly.
Rule 8 columns and 6 rows with a light pencil. The squares on your paper may be larger than those on your reference, but the number of cells and their shape must match. Measure carefully before drawing the subject.
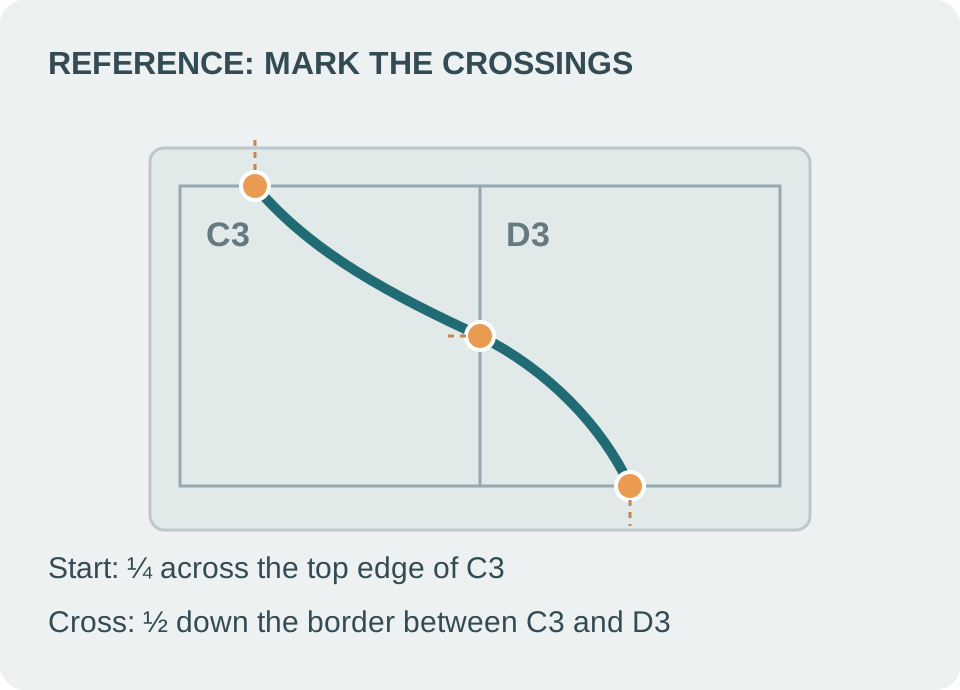
Find where a contour enters and leaves each cell. Mark those crossings, then connect them with the curve you actually see. For example, a line might enter cell C3 a quarter of the way across the top edge and leave halfway down the right edge.
Look at the whole outline, not just one square. Make sure curves meet at the same points along shared grid edges. Compare the empty space around the pitcher, handle and pears to spot proportions that need adjusting.
Once the proportions and outlines look right, gently erase the guidelines. Add the light and shadow afterward. Test erasing on a spare piece of the same paper if you are unsure how hard to press.
Tip: finish cropping before making the grid. Changing the reference midway through a drawing makes the paper grid harder to match.
A matching paper grid needs the same number and shape of squares as the reference. You do not need to make the squares the same physical size. Here is a worked example for an 8 × 6 grid that doubles the size of a 12 × 9 cm reference.
12 × 9 cm, with 8 columns and 6 rows
1.5 cm per square12 ÷ 8 = 1.5 cm. The six rows also measure 1.5 cm each.
24 × 18 cm, with the same 8 columns and 6 rows
3 cm per square24 ÷ 8 = 3 cm. Six rows × 3 cm = 18 cm.
A 24 × 18 cm drawing area fits on A4 paper turned landscape (29.7 × 21 cm). That leaves room around the drawing, although you should check your own paper and margins. If your reference has a shorter bottom row, copy the shorter row rather than stretching it to the height of a full square.
Follow the same pitcher-and-pears illustration through five stages, from the original scene to the finished outline. The reference has a 4:3 shape, so eight square columns make six complete rows. Follow the same 8 × 6 grid on your drawing paper.
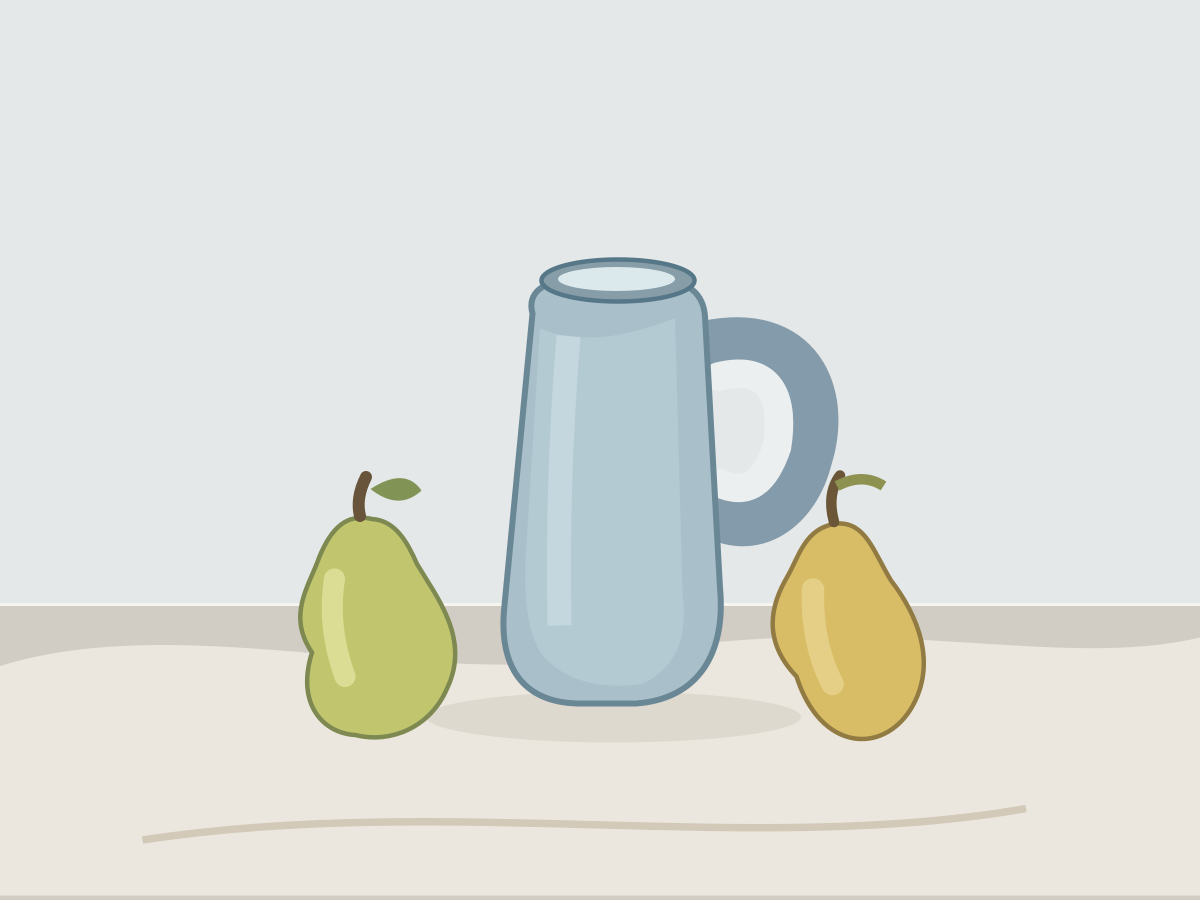
Notice where the pitcher handle, pear stems and tabletop sit. Keep the same crop from the first grid to the finished drawing.
These drawings show the same pitcher and pears at each stage. They are illustrations for practice, not photographs.
This short exercise shows how to use two matching cells. It is a simplified curve for practice, not a traced part of the still life above.
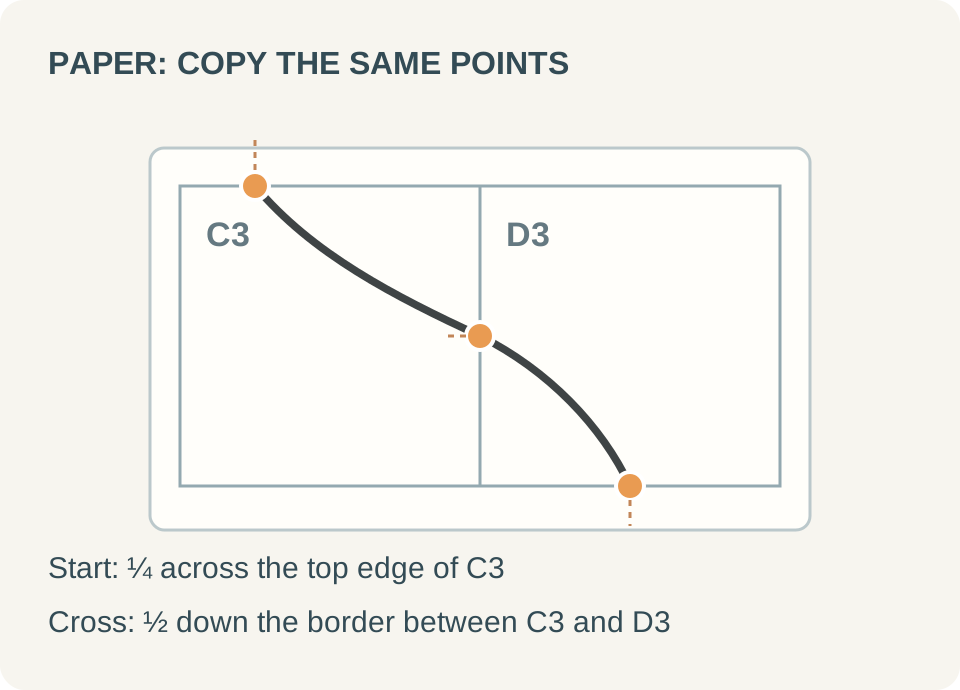
Drawing with the grid method also works for enlarging a small reference. Keep the cell count and proportions unchanged, but increase the measurement of every square on the drawing paper.
For example, an 8 × 6 reference with 1.5 cm squares measures 12 × 9 cm. Draw the same 8 × 6 cells at 3 cm per square and your artwork becomes 24 × 18 cm. Both dimensions have doubled.
Find the size of the squares to draw on your paper.
Your reference fits an exact 8 × 6 square grid. Make every paper cell 3 cm wide and tall.
Use these measurements when drawing the grid on your paper. Your original photo and any downloaded PDF stay unchanged.
Want blank paper with square guidelines? Try the Printable Grid Maker and choose the square size you need. To match an exact 8 × 6 photo grid, mark eight columns and six rows on your drawing paper with a ruler.
More cells are not always better. Start with a grid that makes large shapes manageable, then increase the number of squares only if you need more reference points.
| Suggested grid | Good for | What to watch |
|---|---|---|
| 4 columns | Large objects and simple outlines | Fewer landmarks for small details |
| 8 columns | Still life, landscapes and basic portraits | Check the matching row count |
| 10–12 columns | Detailed features and complex shapes | Too many lines can distract from the drawing |
On a 4:3 image, eight square columns create six rows. An 8 × 8 grid over that same image would have rectangular cells unless you crop the reference to a square first.
On a 4:3 reference, 4 square columns make 3 rows, 8 columns make 6 rows, and 12 columns make 9 rows. With 10 columns, the first 7 rows are full squares and the eighth is only half as tall. Copy that shorter row on paper, or crop the picture before you begin.
The reference and paper do not have matching grid proportions. If the reference uses square cells, the paper cells must be square too. Do not copy an 8 × 8 rectangular grid into an 8 × 8 square one.
Mark where the line crosses each shared border before you draw the curve. Both neighboring cells must meet at that exact point.
Try thinner or lighter grid lines, move labels to the edges, or switch to the original photo while checking a feature. Avoid adding more cells until you actually need them.
Use the same scale in both directions. If you double cell width, also double cell height. Measure the whole grid before transferring the contour.
Rule the paper grid with a light pencil and gentle pressure. Check erasing on a scrap sheet before you transfer the outline. It is easier to lift the grid before you shade.
Compare the full silhouette and the empty areas between objects first. Correct misplaced curves while the drawing is still a light outline, then build up shading and detail.
Try these three small exercises. They are meant to help you observe shapes, not finish a detailed picture each time.
Draw a pear outline using a 2 × 2 grid. Mark where the outline touches each edge, then see whether your four curves join smoothly.
Follow the five-stage pitcher-and-pears example. Check the pitcher height, handle opening and gaps around the pears before adding detail.
Transfer a 12 × 9 cm reference onto a 24 × 18 cm grid. Measure every square at 3 cm and check that the outline stays twice the original size.
Quick answers to common grid drawing questions.
The grid method divides a reference picture and your drawing paper into matching squares. You copy the positions of outlines one cell at a time, checking where they cross grid lines.
Add a grid to the reference, draw the same number of squares on paper, find key points along each cell edge, and connect the contours. Check the overall proportions before erasing the guides and shading.
Yes. It can make it easier to observe the position and size of shapes. Start with a simple image and a few larger squares so you can still see the whole drawing.
No. It is a drawing aid for measuring and observing proportions. You still make the decisions about the lines, curves, edges and shading. It can be used for practice while you develop freehand skills.
Try 4 to 6 columns for simple shapes, or about 8 to 10 columns for more detailed subjects. Keep square cells if you want a square grid; the row count will depend on your reference photo's aspect ratio.
Keep the number and shape of the cells the same but draw them larger on paper. An 8 × 6 reference with 1.5 cm cells measures 12 × 9 cm. At 3 cm per cell, the drawing becomes 24 × 18 cm.
Use Square cell lock on your reference and draw equally wide and tall squares on paper. If the reference ends with a partial row, copy that partial row too or crop the reference before drawing.
Yes. Keep the gridded reference open on your screen and lightly rule the matching rows and columns on paper. Use the same photo crop and grid layout throughout the drawing.